Dimmer
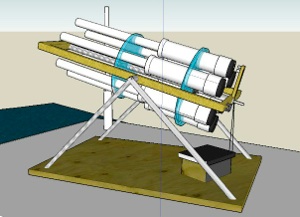
We started by roughing out the design using Google Sketch Up, which by the way, is a wonderful (and free) tool for this sort of thing.
Laying out the supporting rings turned out to be a good lesson in ruler and compass constructions.
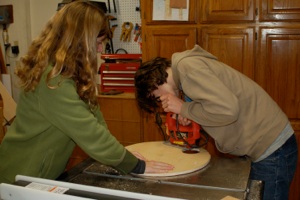
The project required only standard shop tools.
We used ABS for this project since it was a little cheaper, and we were able to buy precut lengths that avoided waste.
The Build
Test FIRING
These things are pretty powerful, loud, and scary looking, so finding a place to test them can be a challenge in itself.
Each barrel must be manually loaded and primed with hairspray. It would be a real challenge to produce an auto-loading design. Maybe next year....


The Ignition system
For the test firing we manually ignited each barrel using a barbeque lighter. We’re now in the process of completing the automatic ignition system.
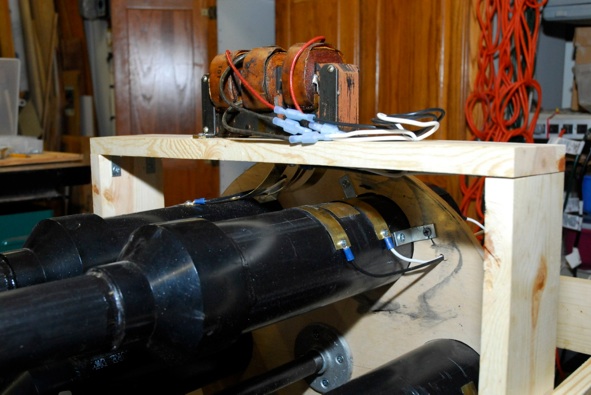
Our automatic ignition system uses a step-up transformer over the rotating barrels and spark plugs in the end-caps of each barrel. Contacts on each barrel cause the transformer to be energized as they move into firing position.
The following image shows a schematic of the system.
Our first attempt to lay out contacts is
shown at right. The high voltage contacts
are the long ones to the left, and the low voltage
contact is one the right. This design ensures that
the high voltage side of the circuit is connected
before the circuit is energize by the low
voltage side, thereby preventing arcing outside
the barrel.


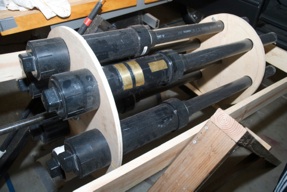
Below is a closeup showing the final design of the contacts along with the transformer mounted above the barrels. We ended up having to separate the high voltage contacts on either side with the low voltage contact in the middle to prevent arcing between them.
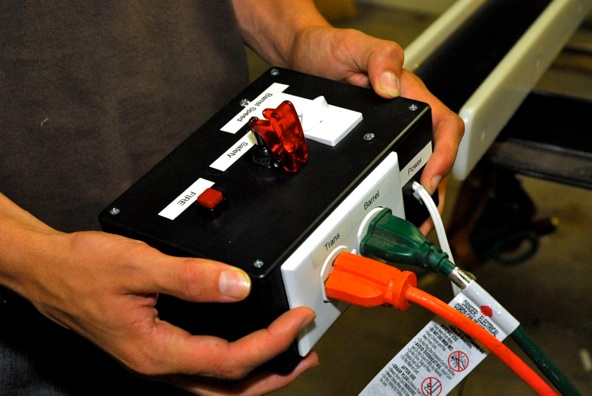
The control Box

We needed a way to spin up the barrels and fire the gun without being right next to it (in case it exploded), so we came up with the idea of having a small control box so we could control everything while standing back from the gun. Since we are using a plug-in drill to rotate the barrels, we hooked up a lightbulb dimmer switch to the drill so we could adjust the speed of the barrels. There is also a safety switch and fire button on the box which when held down energizes the transformer, thus firing the cannon.
As seen in the picture above, the white cord marked “power” supplies power to both the drill and the transformer. Each lead from the power cord is split, and half goes to the dimmer switch marked “barrel speed”, and then to the outlet marked “Barrel”, and the other half goes to the “safety” switch, the “FIRE” button, and the outlet marked “trans”. The schematic is shown below.
First, you select the speed of the barrels by moving the dimmer switch, then you arm it by flipping the safety of, and the FIRE.


Power in
+
--

To drill (barrels)


To Transformer
Safety Switch Fire button
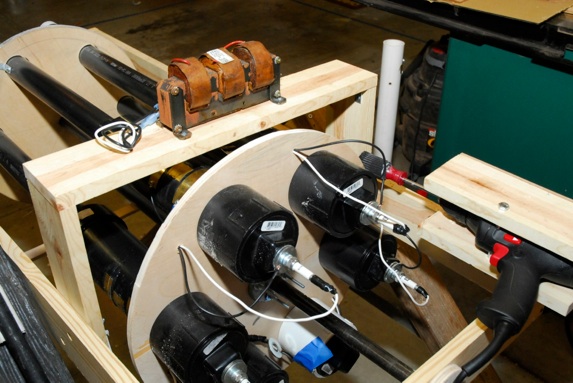
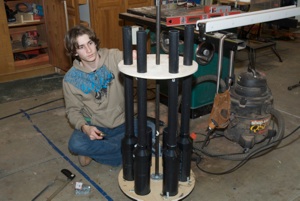
The image below is was taken from behind the gun, showing the spark plugs and the drill mount used to spin the barrels.
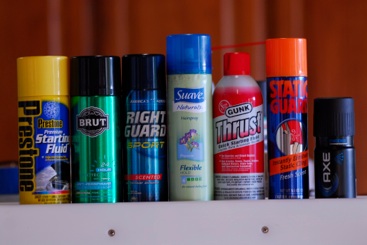
We’ve experimented with a variety of fuels as shown here. We found that hair spray and Brut could stay in the barrel for at least five minutes before firing. Axe and Static Guard, on the other hand, condense within about a minute, and can’t be ignited after that.